Recommended Varieties/Cultivars
Snap peas are cool season vegetables and are generally grown from fall through spring in many parts of California, but may be grown year around in those areas with mild summers where temperatures typically stay below 75° F.
No garden pea is truly heat tolerant, but Sugar Heart allows a longer harvest season into late spring or early summer.
For bush varieties that generally produce smaller, compact, low-growing plants, try Sugar Ann or Sugar Daddy.
For snow peas, GardenZeus recommends Oregon Sugar Pod II, a standout disease-resistant, prolific variety; and the heirloom Mammoth Melting Sugar for its sweetness and large pods.
Buying/Selection Tips
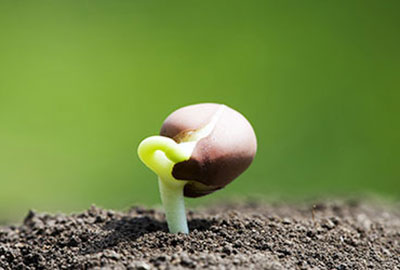
Peas have delicate root systems and dislike like root disturbance, so it's best to purchase seeds rather than transplants. See "Planting Method/Tips" in "Planting and Maintaining" for tips about germinating and transplanting peas.
Soil Needs/Tip
Peas prefer well-drained soil, and are more susceptible to disease and seeds rotting before germination in the heavy clay soils that are common in California. GardenZeus recommends growing peas in containers or raised beds if your soils are heavy or compacted. You may wish to line raised beds with half-inch hardware cloth to exclude gophers.
Peas perform well in a range of soils, and generally do well at pH of about 5.8 to 7.0 and average fertility as long as soil nitrogen and drainage are sufficient.
Suitable Microclimate
The ideal microclimate for peas includes full sun, consistently moist but not wet soil, temperatures of 55° and 65° F, and protection from wind. At temperatures above 75° F, peas may benefit from light shade during warm-to-hot afternoons. Hot temperatures may reduce yields, reduce sweetness and quality of peas, progressively weaken pea plants, and encourage pests and diseases.
Getting Started
Peas are cool-season crops that grow and produce best at temperatures of 55° to 65° F. They tolerate short freezes, which may damage flowers and delay production of pods, but which usually don't severely damage or kill established plants.
The best window for growing peas is often fall through late spring until daytime temperatures are consistently above 80° F. Overnight frost protection may be necessary in some areas in the form of fabric, plastic, or cardboard sheets. Peas may grow and yield very slowly during cold weather.
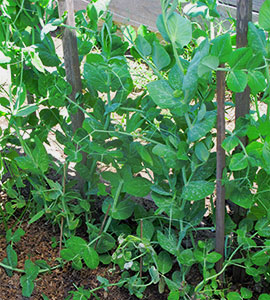
Bush pea varieties are compact plants that take up more soil space than vines, but don't require support or trellising. Vining varieties generally yield more than bush varieties, but require support.
Peas have delicate root systems and dislike like root disturbance, so generally it's preferable to plant seeds directly in garden beds rather than transplanting. GardenZeus recommends never purchasing pea seedlings for transplanting.
A 7-to-10 foot single row of pole or vine peas at final spacing of 3-to-4 inches in reasonably fertile soil is usually sufficient to provide ample peas for one person. Half-again or twice this amount may be preferred by dedicated garden grazers or pea lovers, or if growing peas in poor or infertile soil. Consider planting the equivalent of a 2-to-4-foot row of peas per person every 2 to 4 weeks early in your planting season to provide staggered harvest and a constant supply of peas.
Consider planting extra peas to have enough plants for harvesting young, tender stems and leaves as greens. Pea greens are nutritious and delicious. They are a candidate for GardenZeus expert Darren Butler's favorite green, and can be used anywhere you use other greens, including in salads, soups, sandwiches, or steamed. If growing peas primarily for pods, GardenZeus recommends limiting harvest of greens to 1 or 2 rounds from young pea plants during the first 2 to 5 weeks after germination.
When planting peas in new or uncultivated soil, or in soils where peas haven't been grown for a few years, consider inoculating your seeds before planting. Legume inoculants are powders containing Rhizobium bacteria that help legumes to fix nitrogen from the air into root nodules. Pay close attention when purchasing an inoculant to be sure that it is labeled for your intended legume variety(s).
Inoculants are alive and like seedlings, they need care and protection to remain viable. Avoid opening bags or containers of inoculant until just before planting unless the product's instructions specify otherwise. Store in a cool, dark place out of sunlight or store per the instructions received with the inoculant. Bacteria may die quickly if left in the sun or heat.
Moisten pea seeds and sprinkle a tiny amount of inoculant over each seed when planting, or if planting a large number of seeds, moisten and mix seeds and inoculant together in jar or container before planting. To be effective, inoculant must be on the seed when the root first emerges. Once seeds germinate, inoculation may be irrelevant; do not attempt to go back to previously planted and sprouted seeds to add inoculant after-the-fact. If sprouting seeds indoors, apply inoculant before germinating.
In GardenZeus expert Darren Butler's opinion, there's generally no need to inoculate soils more than once, unless you go a few years without planting peas. If you have planted peas consistently in your garden over years, your soil likely already contains the nitrogen-fixing bacteria, so there is usually no need to inoculate pea seeds again.
Inoculant can be helpful, especially in new soils and where peas have not been grown for years. Is it necessary? GardenZeus expert Darren Butler emphatically believes "no." After inoculating religiously over many years, Darren rarely inoculates anymore, even in new soils, preferring to provide nitrogen using composted manures or diluted urea. For Darren the hassle of ordering, receiving, storing, protecting, and applying inoculant outweighs the benefit. The same Rhizobium bacteria colonize legume roots naturally over time as you grow peas during the first season or two. Inoculating can significantly increase plant vigor and yield, especially during the first year in new soils, but the same results can be achieved by providing sufficient soil nitrogen.
Watering Tips
Peas perform best in soil that stays consistently moist but not wet from germination until harvest. It is especially important to provide sufficient water during early growth and when peas are blooming and setting pods. Pea plants that become water-stressed are permanently affected and will never produce as many pods. Ongoing or repeated drought stress may result in little or no yield.
Water peas using drip or surface irrigation. Sprinklers and wet soils tend to stress pea plants and increase problems with pests and diseases, especially in clay and heavy soils. Peas are often shallow-rooted, and even more so in alkaline and compacted soils, but can grow deeper root systems in loose, fertile soils. Water progressively more deeply and less frequently without ever allowing soil to dry or pea plants to wilt between waterings. This will encourage deeper rooting that will help plants to produce abundant yields and to tolerate periods of warm weather.
Peas may benefit from daily watering during warm and hot weather.
Planting Method/Tips
Peas have delicate root systems and dislike like root disturbance, so it's best to purchase seeds rather than transplants.
Pea seeds can be planted quickly and in large quantities by preparing a shallow furrow about 1 to 2 inches deep with a hoe, spacing seeds 1 to 2 inches apart in the furrow, and raking or hoeing soil over the entire length of the furrow. If applying inoculant, mix with a batch of seeds in advance or sprinkle onto moist seeds when planting.
Direct seeding generally produces more robust plants than transplanting seedlings; however, pea seeds germinate best at warmer temperatures of 75° to 80° F, and may tend to rot before germinating at temperatures below about 60° F, especially in wet soils. This cultural need combined with fussiness about transplanting can present a conundrum for gardeners: seeds may tend to rot if started outdoors during cool periods, but may be shocked or underperform if grown as seedlings and transplanted.
GardenZeus expert Darren Butler offers the following methods and solutions to succeed with pea germination:
1) Start pea seeds indoors at warmer temperatures on a moist paper towel in a covered glass dish. At temperatures of 75° to 85° F or with bottom heat, pea seeds may germinate in a very short time, such as within 2 to 4 days. If using inoculant, apply to seeds when they are first moistened for germination.
Transplant the seed outdoors as soon as a pea root emerges from the seed. This way you know that the seed germinated, its immune system is activated before it encounters pathogens in the soil jungle, you avoid the possibility of it rotting ungerminated in cold soil, and you also avoid the problem of disturbing pea roots by transplanting seedlings. This method requires daily monitoring of peas seeds while germinating and planting promptly once roots emerge. Should roots become entangled with the paper towel, cut the towel carefully and plant the seed with paper towel attached to the pea roots rather than risk breaking new roots.
2) If possible, when planting directly outdoors, wait to plant pea seeds until you have a stretch of 2 or 3 days in a row when daytime temperatures are forecasted to be 70° F or warmer. You should see faster seedling emergence and better germination rates when peas are planted during warmer periods. The drawback to this method is that forecasts may be wrong or you might wait longer than expected for a warm period, miss part of the cool growing season, and have reduced yield for plants that are started late and subject to warm or hot weather during harvest later in spring.
3) Skilled biointensive gardeners and those who are able to monitor seedlings daily may succeed with pea transplants; the secret is to catch them very early, as small seedlings about 1 to 2 weeks after germination, and before roots touch the sides or bottom of planting cells or worse, become rootbound. Start seeds in small pots at least 2 inches deep and wide, and transplant with care to disturb the roots as little as possible.
While GardenZeus expert Darren Butler generally does not recommend planting vegetables in standard rows because this uses space inefficiently in small home gardens, pole peas can be an exception, and generally it’s easier to provide support and harvest when peas are planted in rows or row-like sections.
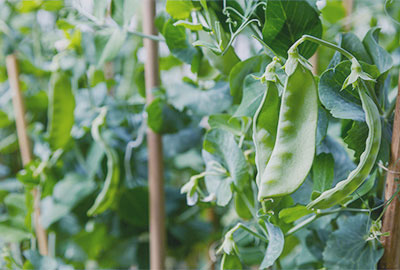
Pole or vining peas need support, which can be provided with wire or other garden fencing, stakes with stringline spaced at intervals of about 6 to 12 inches, or trellises. Pea vines may grow vigorously in the direction of sunlight. GardenZeus recommends open, airy support that will not block sunlight to any plants or their lower leaves, and that allows peas to be planted on both sides of the support without being shaded.
Install support or trellises when germinating seeds or while seedlings are small. This will help prevent later damage to plants that may be caused by driving stakes through their root systems or when untangling vines to retrain to support. Pea plants will train themselves to support if it is in place early or while they are still young. Unruly or older plants may be attached to trellises or retrained with loosely tied string, tie tape, or twist ties.
Spacing
When seeding directly, plant vining snap-pea seeds about 1 to 1.5 inches deep and space about 1 to 2 inches apart if thinning, or 2 to 4 inches apart if not thinning. Consider sowing seeds in staggered rows within planting bands that are several inches wide on each side of open, airy support such as wire fencing or stakes with string.
Germination may be improved and rotting minimized in cool, wet soils if peas are planted at a depth of 1/2 to 1 inch because the upper soil layer dries more quickly. On the other hand, peas may benefit from deeper rooting and easier access to soil moisture by being planted at a depth of about 1.5 to 2 inches in warm, loose, sandy, or rapidly drying soils. Thin as needed to retain the healthiest and most vigorous plants, to an eventual final spacing of about 3 to 4 inches. Cook or eat thinnings as greens.
For skilled gardeners transplanting seedlings, pole peas should be planted in final anticipated spacing of about 2 to 4 inches. Bush varieties can be seeded about 2 to 3 inches apart or transplanted to final spacing of 5 to 10 inches.
Timelines
3 to 12 days or longer to seed germination (rapidly in warm soil at about 70˚ to 85˚ F and slower, possibly weeks in cool or cold soil at 60° F or below). While pea seeds may technically take weeks to germinate, GardenZeus expert Darren Butler has found that most pea seeds rot in cool-season, heavy soils if not germinated within about 10 to 14 days. Pea seeds germinate quickly in warm, loose, moist soil, and are subject to rotting in cold, wet, compacted or heavy soils.
Transplant seedlings only if you are able to monitor them from germination; transplant carefully during a short window when seedlings are small, about 1 to 2 weeks after germination.
About 10 to 21 days to earliest harvest of thinned plants for greens.
Thin new starts by cutting at soil level with garden scissors or snips when 1 to 6 inches tall, to final spacing by 2 to 3 weeks after germination.
About 2 to 5 weeks to begin cut-and-come-again harvesting of new growth for greens, beginning when plants are about 6 to 12 inches tall.
50 to 80 days from germination to harvest of first pods for most snap-pea varieties, depending on variety and growing conditions. Peas grow more slowly in cold weather, so winter plants may not produce pods until the longer end of this range.
Peas can produce for a period of 2 to 3 months or longer after first pods appear. This requires that pods be consistently harvested and not allowed to become overmature on the plants, that plants are unstressed by heat, lack of water, or other environmental stress, and that cultural needs are generally met.
Pollination Needs/Tips
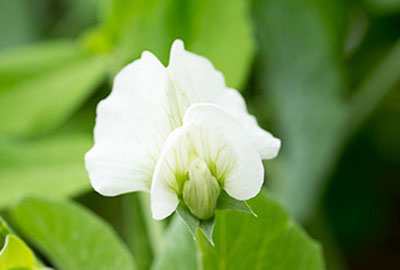
Peas produce perfect flowers, with both male and female parts. Self-pollination usually occurs before pea flowers open. Provided that their basic cultural needs are met, peas produce well in areas without bees or other insect pollinators. They are among the easiest garden vegetables for saving seeds.
Interplanting/Companion Planting
Peas are good companions for many garden vegetables, herbs, and flowers. GardenZeus recommends lettuce, other small greens, and mint as companions for peas.
Some sources recommend planting peas or other legumes with plants that need a lot of nitrogen, but this advice may be misguided. Peas and other legumes that are grown to harvest use most or all of the nitrogen they fix in their roots. If roots, or better yet, entire legume plants, are left in soil or tilled under, or peas are tilled under before they produce pods and seeds, this may provide additional soil nitrogen to the crop that follows, but plants near actively growing peas and other legumes may obtain little to no nitrogen from the soil-fixing of legumes. If your legumes are fixing nitrogen (which you can determine by checking a few mature roots for nodules that appear pinkish or reddish on the outside or inside), consider rotating in a crop after the legumes that needs significant amounts of nitrogen, such as corn, tomatoes, potatoes, or squash.
Root crops such as radish, carrot, and turnip are often suggested as companion plants for peas. If planting root crops near peas, be sure to do so at a sufficient distance to avoid disturbing pea roots when the root crops are harvested.
Onions are antagonists to beans and peas; traditionally these plants are believed to stunt or negatively affect each others' growth. GardenZeus expert Darren Butler has seemingly endless bits of gardening lore and anecdotes of unknown origin that knock around and occasionally shake loose inside his head. One such orphaned gardening thought is that some onion exudates, which are substances excreted by plant roots, can be absorbed by pea and bean plants and may result in sour or bitter, oniony-tasting legumes. If this is actually true, with foodie interest in novelty and gourmet vegetables, one might expect onion-flavored peas to headline many a pricey menu, with peas and beans grown inside an onion jungle to have their 15 minutes of fame as the newest trendy cash crop. In any case, traditional consensus suggests that planting onions near peas and beans is unwise to the point of bordering on the perilous.
Nutrient/Amendment/Fertilization Needs/Tips
Peas are generally considered light feeders. GardenZeus expert Darren Butler considers them light-to-moderate feeders. Peas perform reasonably well in average soils provided that nitrogen is sufficient. For abundant yields, they prefer an acidic pH with sufficient soil organic matter and nutrients, particularly nitrogen, phosphorous, and potassium. Phosphorous is usually sufficient in soils in California but may be unavailable due to high soil pH. Potassium availability in soils is less dependent upon pH, and it may be deficient.
Unless your soil is already high in nitrogen, GardenZeus recommends adding nitrogen in the form of diluted urea or a cup of chicken manure diluted in 4 gallons of water (half cup if fresh manure) and mixed thoroughly after seedlings are several inches tall and about once per 3 to 4 weeks thereafter, or every 10 to 14 days if growing peas primarily for leaves. Adding too much nitrogen may result in lush, high-carbohydrate leaves that attract insect infestation. Overfertilized pea plants may be slow to produce pods.
When planting peas in new or uncultivated soil, or in soils where peas haven't been grown for a few years, consider inoculating your seeds before planting. Legume inoculants are powders containing Rhizobium bacteria that help legumes to fix nitrogen from the air into root nodules. To be effective, inoculant should be applied when seeds are planted or prior to germination. Pay close attention when purchasing inoculant to be sure that it is labeled for snap peas or all peas.
Mulching
Peas may tend to form shallow roots, especially in the heavy, infertile, alkaline, poorly drained soils that are common in California. Mulching peas is essential to keep soil cool during unseasonable warm weather, and to help maintain consistent soil moisture. GardenZeus recommends 1/2 to 1 inch of fine-to-medium mulch, such as leaves, lawn clippings that are free of weeds, straw, or pine needles beginning when peas are 3 to 4 inches tall, to be increased to 1 to 1.5 inches or more for mature plants.
Pruning/Cutting Back/Pinching/Separating
When growing peas for pods, it is generally unnecessary to pinch back or prune them. If growing peas for greens only, GardenZeus recommends pinching off main stems for the first time when plants are 6 to 10 inches tall, which will encourage compact, branched plants with more tender, new growth; and pinching thereafter about every 5 to 14 days to continue encouraging new stems. Harvest new leaves and stems up to portion of about 20% of any given plant about every 2 to 3 weeks. See "How to Harvest" in "Seasonal and Harvesting" for more information.
Propagating
From seed. GardenZeus recommends open-pollinated, untreated, organically grown seeds.
Container Gardening
The heavy soils that are common in California may tend to encourage root diseases and reduce pea yields, especially in new gardens or uncultivated areas. Growing in containers may be an ideal solution, but can lead to the opposite problem: soils may dry rapidly in containers, causing water stress and reducing yields. If growing in containers, pay close attention to soil moisture and frequency of irrigation, and be sure to water sufficiently to avoid any signs of wilting. If you know you may have difficulty maintaining consistent soil moisture, consider using self-watering containers, which have a reservoir of water and a wicking mechanism, such as cloth or soil tubes. These can be purchased or made yourself.
Growing peas in containers provides the added benefit of allowing you to move the plants into sun when growing over winter and into shade during heat waves or when pushing to extend harvest into the warmer months of late spring and early summer.
All varieties of snap peas and snow peas can be grown successfully in containers. Bush varieties of snap peas, such as Sugar Ann and Sugar Daddy, produce compact, low-growing plants that are ideally suited to containers. For growing snow peas in containers, GardenZeus recommends Oregon Sugar Pod II.
Pots or containers for growing peas should be of at least 10 inches in depth, preferably deeper. GardenZeus recommends a soil mix of at least 50% topsoil or sand when growing peas in containers. Potting soils with high proportions of organic matter tend to shrink and collapse over the course of a growing season as soil microbes and macro organisms like insects digest or decompose the organic matter, which results in falling soil levels and possibly insufficient soil depth for peas to yield well.
Seasonal Care
Peas are cool-season crops that grow and produce best at temperatures of 55° to 65° F. They tolerate short freezes, which may damage flowers and delay production of pods, but which usually don't severely damage or kill established plants.
The prime window for growing peas in many parts of California is from fall through spring until daytime temperatures are consistently above 80° F. It's often best to sprout seeds indoors before planting outside, especially when temperatures are consistently below about 70° F.
Peas may need overnight frost protection in the form of fabric, plastic, or cardboard sheets., may grow and yield slowly during cold weather, and are prone to root diseases in heavy, wet soils.
When pea plants have stopped bearing, either at the end of a full several-weeks-to-3-months harvesting period, or as the result of stress such as from hot weather, GardenZeus recommends digging or tilling in entire plants (if uninfested) as soil organic matter. For other plants to receive the benefit of nitrogen fixing in soil, it is necessary to leave the roots of peas in the soil. When removing pea plants to clear space for other plantings, cut them at ground level to avoid removing roots.
How to Harvest
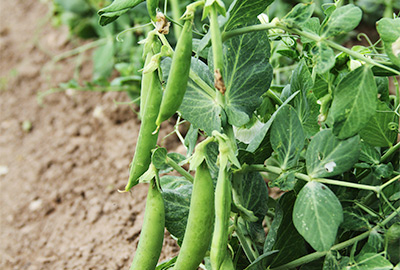
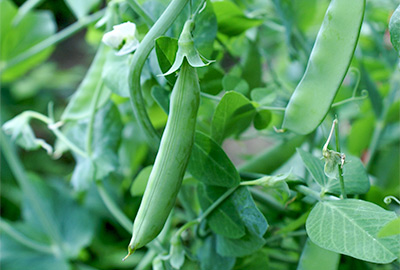
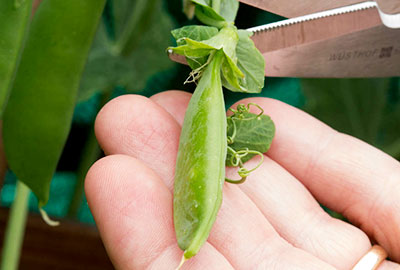
Snap pea pods are sweetest and most tender in cool weather when they are young and while still increasing in size. GardenZeus recommends harvesting when pods have swelled but before they are fully plump. GardenZeus expert Darren Butler prefers to eat snap peas before the rounding of individual peas is apparent through the shell of a pod.
Pea plants are delicate and may have shallow root systems; stems are easily bent or broken. Avoid the temptation of pulling on pods to harvest them; this may break stems or pull the plant off of its trellis or support. For smaller or shallow-rooted plants, the harvesting-by-yanking method may partially or completely pull plants out of soil. GardenZeus recommends harvesting pea pods with garden shears, kitchen or garden scissors, or a sharp knife. An alternative, recommended only as a back-up measure or when the sudden need arises to graze on snap peas while garden shears and knives are at an impossible distance, is to use both hands: hold the stem above the pod with one hand, and use the other to pinch or pull off the pod.
Want to harvest from your snap pea plants within 10 to 30 days after germination? Try harvesting new, tender stem sections with leaves, especially when plants are young. Pea greens are nutritious and delicious. They are a candidate for GardenZeus expert Darren Butler's favorite green, and can be used anywhere you use other greens, including in salads, soups, sandwiches, or steamed.
If growing peas primarily for pods, GardenZeus recommends only 1 or 2 rounds of greens harvesting from young pea plants during the first 2 to 5 weeks after germination. If growing peas for greens only, GardenZeus recommends pinching off main stems for the first time when plants are 6 to 10 inches tall, which will encourage compact, branched plants with more tender, new growth; and pinching thereafter about every 5 to 14 days to continue encouraging new stems. Harvest new leaves and stems up to portion of about 20% of any given plant about every 2 to 3 weeks.
Multiple or ongoing harvests of stems and leaves may greatly reduce later yield of pods. For the best of both worlds, pinch snap peas for the first time when they are about 10 to 12 inches tall, provide sufficient soil nitrogen, harvest a round or two of tender leaves and stems, and allow plants to mature thereafter without further harvest of stems and leaves.
Harvesting Tips
As with all garden vegetables, but especially those that are tempting to harvest and eat immediately, GardenZeus strongly recommends washing snap-pea pods thoroughly before eating (who knows what the last several bugs stepped in before they walked on your pea pods) but snap-pea pods are otherwise ready to eat immediately after harvest.
Harvest regularly, every day or every other day, to encourage production of new pods and maximize yield from snap peas over a possible bearing period of weeks to months. Pea plants may produce few new pods while maturing seeds in existing pods.
Check plants carefully to avoid allowing any pods to stay on pea plants. As with all annual vegetables, the life cycle of pea plants is based on reproduction (blooming then setting seeds). If pods are allowed to persist on plants until the seeds are fully mature, the plant may stop producing, decline, and die. If you allow the first dozen or two pods to mature and develop seeds, that may exhaust the plant and become your entire harvest; whereas, if you harvest all pods when young, a pea plant may continue to produce consistently for 2 to 3 months or longer. Allowing a few pods on a given plant to go unharvested, such as those hidden among weeks or in another out-of-sight area, may reduce yield and shorten the harvest period.
Peas may quickly lose flavor and sweetness at maturity, during hot weather, and within hours to days after being harvested, as sugars in the pods and seeds turn to starches. They are best used or preserved immediately after harvest. Even 2 or 3 days of hot weather may negatively impact the flavor of snap peas. Older pods become tougher and stringy, with less sweetness and flavor, to the point that pods become inedible and the less-flavorful peas may need to be shelled to be eaten.
Production of pods may decline significantly or stop at high temperatures. Provide shade on warm-to-hot days to encourage peas to produce for a longer period.
What Commonly Goes Wrong
Unseasonal planting and hot weather: Peas are cool-season crops, and should be grown from fall through spring in many portions of California. It may be helpful to sprout pea seeds indoors during cool weather before planting outdoors, and early plantings may need overnight frost protection during cold snaps, using fabric, plastic, or cardboard sheets. Peas suffer at temperatures above 75° to 80° F. Temperatures above 80° F may cause a range of issues including stunting, reduced pod production, and pest or disease infestation.
Slow growth, lack of vigor, small plants, production of few pods, yellowing leaves, dried-out or brown leaves, lack of pod production, lateness in yielding, small pods or yields: These common symptoms may result from soil pH that is too high or too low, compacted soil, alkaline soil, overwatering, underwatering, irregular watering or drought stress, poor drainage, warm or hot weather, frost, lack of soil nitrogen, other soil nutrient deficiencies, soil infertility, or a combination of these. They may also be the result of wind or other environmental and abiotic stressors.
Lush, healthy plants that do not produce pods: Usually the result of overfertilizing with nitrogen. Stop fertilizing. If late in the season with hot weather approaching, as an emergency measure, withhold water until plants wilt slightly; water stress may encourage the pea plants to bloom and enter their reproductive cycle.
Brown and dead leaf tips or edges: Burned leaf tips often result from over fertilizing, sodic soils, animal urine, over application of manure or urea, or soluble salts in soils.
Pods that are tough, thin, blemished, or otherwise of poor quality: This may be caused by drought stress, warm or hot weather, wind, multiple frosts, or other adverse environmental conditions.
Small yields or short harvest periods followed by decline; also bitter, tough, tasteless, stringy, or poor-quality pods and peas: This often results when pods are allowed to remain unharvested on plants until they become over mature. The parent plant will often stop producing new pods while maturing existing pods and seeds, and may decline and die if several to a dozen or more pods are left unharvested. Be diligent in removing weeds and looking carefully for all pods on every pea plant. Harvest all pods when young, generally before it is possible to discern the roundness of individual pea seeds inside each pod. These symptoms may also be caused by hot weather and other environmental stressors.
Wilting or blemished flowers, dropped blooms: May be caused by frost, lack of water, or other environmental stressors.
Overwatering and wet soils: Peas become stressed and susceptible to pests and diseases as a result of poor drainage or standing water. In poorly drained soils, it is possible for the soil surface to be dry but water to be perched or pooled beneath the surface.
Chlorosis is iron deficiency that appears as lightening or yellowing between veins on older leaves and/or pale green or yellow new leaves. Affected leaves will never return to normal because iron is not a mobile nutrient, meaning that it cannot be relocated within a plant. Alkaline city water and alkaline soils are common causes of chlorosis; iron becomes decreasingly available to plants when soil pH is above 6.0, and is mostly unavailable at pH of 7.0 and above. Applying chelated iron can help temporarily but is not a long-term solution or cure, and chelated iron may rapidly become unavailable in alkaline soils. The best solutions are to encourage a thriving, healthy soil ecosystem that will naturally improve pH; provide acidity to soil by watering with diluted vinegar at proportions of about 1/4 to 1/2 cup of white vinegar in 2 gallons of water; or use an acidifying product such as pH Reducer.
Not a Problem
Small pods: Many varieties of snap peas produce small pods, in some cases with no peas or only 1 to 2 peas, along with the larger, plumper, fuller pods with more peas. This is likely the result of varietal genetics, and there may be nothing that can be done other than to select a different variety next time you grow snap peas. Often, "improved" varieties of peas include fewer small pods.
Mildly bug-eaten leaves and pods: Many garden pests seem to especially relish young, new pea growth (this is one of hopefully a small number of ways in which GardenZeus expert Darren Butler is similar to bugs). Peas generally produce well despite leaves being somewhat bug bitten.
Dieback of lower and shaded leaves: As peas establish and train themselves to trellises, and as plants grow larger and more dense, various parts of the plants, especially lower leaves, may become shaded. Plants maintain their bodies and leaf surfaces efficiently for sun capture and growth, for availability of resources, and in proportion to roots; plants may allow shaded leaves in particular to yellow and die because the biological costs of keeping them may outweigh their benefits when they are not capturing as much sunlight. This usually happens as the result of natural growth as plants become larger, and as long as the proportion of yellowing and dead leaves remains small at any given time, like in the range 5% to 15% of total leaf surface, this is unlikely to indicate a major problem.
Common Diseases
Seed decay: Pea seeds are prone to rotting before they germinate, especially in cold, wet soils. When possible, plant seeds during periods of warmer weather at or above 70° F and improve drainage or avoid overwatering. Better yet, sprout seeds indoors before planting outside. Sprouting seeds indoors provides many benefits: you know that the seed germinated, its immune system is activated before it encounters pathogens in the soil jungle, you avoid the possibility of it rotting ungerminated in cold soil, and you also avoid the problem of disturbing pea roots by transplanting seedlings. See "Planting Method/Tips" in the GardenZeus section "Planting & Maintaining" for more information.
Damping Off: Common fungi and other pathogens in soil may suddenly kill smaller seedlings and starts. This occurs most commonly in cool, damp soils.
Root and stem rots: Peas are susceptible to a variety of disease organisms in soil, particularly Fusarium, that thrive in wet and anaerobic soils, but can occur in a range of soils and growing conditions. These pathogens may persist in soils for many years. Provide better drainage and/or reduce watering. Plant resistant varieties, avoid planting in soils where the pathogens are known to have infested plants during the past several years, and provide appropriate cultural conditions. Rotate crops and avoid planting peas repeatedly in the same soil, or in soil where related legumes were grown recently. Encourage a healthy, living soil ecosystem that will naturally support plants and help keep soil diseases in check.
Mildews: Powdery and downy mildew are probably the most common leaf-diseases of peas in many portions of California. They appear as whitish circles or whitish layers on the upper or lower surfaces of leaves, yellowing or dead spots, or pale or yellow angular leaf sections, and may be mistaken for other problems, such as nutrient deficiencies. Powdery mildew is more commonly a problem in your zone than downy mildew, and is especially prevalent later in spring or after periods of hot weather. Avoid wetting foliage when watering, and water early in the day to avoid plants being wet overnight.
Some mildews can be discouraged using a nontoxic homemade spray of one tablespoon each of baking soda and tea tree oil per quart of water, shaken vigorously and regularly and applied via spray bottle. Mildews are often difficult to control and are best managed through prevention and good cultural practices, such as planting resistant varieties, allowing extra space between plants, planting in areas with good air circulation, keeping foliage dry, less-frequent irrigation, encouraging biologically active "living" soil that will support strong plant immune systems, and rotating crops.
Mildews are often not fatal and peas may produce reasonable yields and fresh uninfected leaves despite ongoing infections on older leaves. The majority of pea plants may develop mildew infections between late spring and midsummer in your zone, as fruiting and increasingly hot weather slowly exhausts them and their immune systems weaken.
Common Pests
Aphids occur more often in spring to summer or during warm weather than from fall through winter. They can sometimes be removed with a strong stream of water, or washed off leaves with a cloth or rag before plants become fully infested. Aphids are often associated with Argentinian ant infestations; ants move the aphids to uninfested leaves and plants, and fight off predatory insects in return for harvesting the honeydew that aphids excrete. Control the ants using a boric-acid ant bait.
Earwigs, potato bugs, and cutworms may devastate pea seedlings. Potato bugs are especially prevalent in newly cultivated and overly wet soils that are high in organic matter. If your seeds apparently fail to germinate, or if small seedlings disappear overnight or are chewed back to stems, check for moist areas nearby that may be harboring these insects (or technically crustaceans, in the case of potato bugs).
Birds may eat pea seedlings and new growth.
Other common pests of peas include slugs, snails, leafminers, thrips, armyworms, cucumber beetles, gophers, rabbits, and deer.
Special Care
Pole or vining peas need support, which can be provided with wire fencing or other garden fencing, stakes with stringline spaced at intervals of about 8 to 12 inches, or trellises. Pea vines may grow vigorously in the direction of sunlight. GardenZeus recommends open, airy support that will not block sunlight to any plants or lower leaves, and that allows peas to be planted on both sides of the support without being shaded.
Install support or trellises when germinating seeds or while seedlings are small. This will help prevent later damage to plants that may be caused by driving stakes through their root systems or when untangling vines to retrain to support. Pea plants will train themselves to support if it is in place early or while they are still young. Unruly or older plants may be attached to trellises or retrained with loosely tied string, tie tape, or twist ties.
Special Info
Some sources recommend planting peas or other legumes with plants that need a lot of nitrogen, but this advice may be misguided. Peas and other legumes that are grown to harvest use most or all of the nitrogen they fix in their roots. If roots, or better yet, entire legume plants, are left in soil or tilled under, or peas are tilled under before they produce pods and seeds, this may provide additional soil nitrogen to the crop that follows, but plants near actively growing peas and other legumes may obtain little to no nitrogen from the soil-fixing of legumes. If your legumes are fixing nitrogen (which you can determine by checking a few mature roots for nodules that appear pinkish or reddish on the outside or inside), consider rotating in a crop after the legumes that needs significant amounts of nitrogen, such as corn, tomatoes, potatoes, or squash.
When planting peas in new or uncultivated soil, or in soils where peas haven't been grown for a few years, consider inoculating your seeds before planting. Legume inoculants are powders containing Rhizobium bacteria that help legumes to fix nitrogen from the air into root nodules. Pay close attention when purchasing inoculant to be sure that it is labeled for your intended legume variety(s).
Inoculants are alive and like seedlings, they need care and protection to remain viable. Avoid opening bags or containers of inoculant until just before planting unless the product's instructions specify otherwise. Store in a cool, dark place out of sunlight or store per the instructions received with the inoculant. Bacteria may die quickly if left in the sun or heat.
Moisten pea seeds and sprinkle a tiny amount of inoculant over each seed when planting, or if planting a large number of seeds, moisten and mix seeds and inoculant together in jar or container before planting. To be effective, inoculant must be on the seed when the root first emerges. Once seeds germinate, inoculation may be irrelevant; do not attempt to go back to previously planted and sprouted seeds to add inoculant after-the-fact. If sprouting seeds indoors, apply inoculant before germinating.
In GardenZeus expert Darren Butler's opinion, there's generally no need to inoculate soils more than once, unless you go a few years without planting peas. If you have planted peas consistently in your garden over years, your soil likely already contains the nitrogen-fixing bacteria, so there is usually no need to inoculate pea seeds again.
Inoculant can be helpful, especially in new soils and where peas have not been grown for years. Is it necessary? GardenZeus expert Darren Butler emphatically believes "no." After inoculating religiously over many years, Darren rarely inoculates anymore, even in new soils, preferring to provide nitrogen using composted manures or diluted urea. For Darren the hassle of ordering, receiving, storing, protecting, and applying inoculant outweighs the benefit. The same Rhizobium bacteria colonize legume roots naturally over time as you grow peas during the first season or two. Inoculating can significantly increase plant vigor and yield, especially during the first year in new soils, but the same results can be achieved by providing sufficient soil nitrogen.
Sustainable Landscaping Tip
Peas do not naturalize well in many portions of California, and it may be more complicated to actually receive the benefit of soil-nitrogen fixation from legumes than many permaculturists and sustainable-gardening enthusiasts may claim or realize. Properly inoculated legume cover crops that are tilled under as green manures are preferable for fixing soil-nitrogen as opposed to garden legumes and vegetables grown for harvest, as legume plants for harvest use most of the nitrogen they fix to produce their own crops, and generally do not share nitrogen with nearby plants until after their own growing season.
Peas offer a special benefit for sustainability in that they are generally easy and reliable to grow from seed and for saving seeds. GardenZeus recommends selecting several of the most vigorous, early plants, and saving the entire crop of first, full pods, as well as selecting early full pods from other plants. Note that this will reduce yield for harvest, as growing even a few pods to full maturity tends to exhaust plants. Allow pods not grown to maturity to remain on the plants until pods fade from dark green to light green, yellow, and finally tan or brown. Remove and shell pods after they appear brown and dead, and after nearby stems are brown and dry, or after the entire plant is dead. By selecting the most vigorous, productive, and healthy plants for seed-saving, over the course of several to a dozen or more plant generations, you can refine a strain of pea that is highly productive and perfectly suited to your exact soil and growing conditions.
Advanced Tip
Try growing peas here and there near other garden annuals that can provide natural support and trellising, such as lambsquarters (Chenopodium album), quinoa, tomatoes, borage, cardoon, and amaranth; or perennials such as artichokes, tree collards, or Mexican marigold (Tagetes). Be sure that the seasonal water needs of the peas and its companion are compatible, and space peas widely to prevent too much shading of companion plants.
Preservation, Storage, and Use
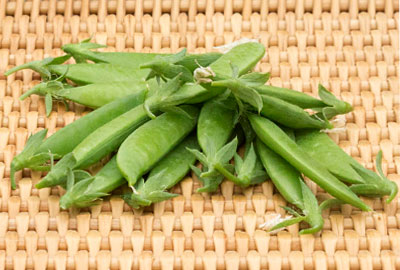
Snap-pea and snow-pea pods are eaten raw out of hand and in salads. They are eaten cooked as stir-fried, baked, steamed, in soups, and in other dishes. Most chefs and serious cooks prefer to remove strings from snap and snow peas before cooking.
Snap and snow peas are wonderful when sauteed. Consider combining pea pods and pea greens with other early spring vegetables, such as fava beans, asparagus tips, and bunching onions, for a ragout or a sauce used over pasta.
New leaves and stems of snap and snow peas provide succulent greens that generally aren't available at supermarkets. Pea greens make a delicious, nutritious addition or substitution wherever you use greens: salads; sandwiches; as steamed; briefly stir-fried or sauteed with a tablespoon of good olive oil and some salt; or added to soups, stews, and risottos during the last minute or so of cooking. The flower blossoms of edible peas (not those of ornamental or sweet peas) are also edible.
Most vegetables are at their best when harvested fresh from the garden and eaten immediately, whether raw or cooked. This is especially true with peas. GardenZeus recommends planning ahead whenever possible to eat, cook, or preserve peas immediately after harvest. Pea greens are delicate and don't store well. If not eating or preserving immediately, cool your pea pods and pea greens promptly after harvest.
Peas begin to lose flavor after they are harvested, as sugars in the pods and seeds turn to starches. English or green peas are famous for rapidly losing sugar; some varieties lose half their sugar in a few hours at room temperature. Snap and snow peas lose flavor and sweetness over a longer period, declining noticeably over days. For sensitive cooks and eaters, their quality may be significantly reduced within 24 to 48 hours, even when refrigerated.
Ideal storage conditions to maximize shelf life for peas are 32° F and maximum humidity with some air circulation, such as in a perforated plastic bag, and under these conditions peas will retain reasonable quality for up to 2 weeks or slightly longer. Pea greens can be stored in a perforated plastic bag under similar conditions for about a day. This is colder and at higher humidity than is provided by most refrigerators. Snap and snow peas can be stored in the refrigerator for about a week to 10 days with a progressive decline in quality.
Snap and snow peas are moderately sensitive to ethylene gas; place your peas in the refrigerator away from ethylene-producing fruits.
When harvesting a large volume of snap or snow peas at one time, consider freezing. Blanch snap or snow peas in boiling water for 30 seconds to 2 minutes, until the green color of the peas brightens, then immerse in ice water to cool quickly and prevent overcooking. Blanching softens leaves and stems, which makes them easier to work with when preparing for freezing, and helps to preserve nutrition and flavor. To minimize freezer burn, remove air from freezer bags using a vacuum sealer or manually with a straw inserted into an almost-sealed bag. GardenZeus recommends using frozen snap and snow peas within 60 days, but flavor and quality may be reasonable for longer periods.
Snap and snow peas are high vitamins A and C; in various minerals, such as calcium, iron, copper, zinc, selenium, and manganese; and in fiber and folic acid. Pea greens are also a good source of Vitamin C.